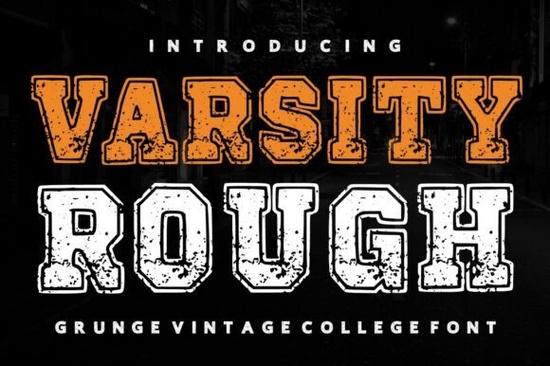
When you are designing apparel or promotional materials that need to look established and tough, few styles capture that energy quite like Varsity Rough Font. This typeface brings a specific kind of nostalgia to the table, combining the rigid structure of slab serifs with a weathered, textured finish. It mimics the look of lettering that has survived years of washes on heavy cotton or faded paint on an outdoor banner. Whether you are building a brand for a local gym, creating graphics for a high school sports team, or selling vintage-inspired t-shirts through a print-on-demand service, getting the typography right changes everything. Using the wrong style can make a project feel cheap or temporary, but choosing the right distressed typeface adds immediate character and authenticity.
What Projects Benefit Most From This Typography?
The versatility of this font lies in its ability to fit into contexts where durability and heritage matter most. You might find yourself reaching for it when designing jerseys, because the blocky shapes translate well to fabric even at smaller sizes. It is equally effective for large-scale signage where visibility is key. Unlike delicate scripts or ultra-modern sans-serifs, this collection leans heavily into a classic aesthetic. This makes it ideal for:
- Sports Team Logos: Create emblems that suggest history and pride rather than fleeting trends.
- T-Shirt Designs: The rough edges prevent the text from feeling like a standard vector print, adding visual interest.
- Event Posters: Use it for concert flyers or university fairs where a gritty vibe fits the atmosphere.
- Brand Mascots: Pair the letters with illustrations of animals or mascots to round out the mascot identity.
If you decide to purchase the files online, you can find detailed previews before committing. To ensure you have access to the highest resolution versions suitable for commercial use, you might want to explore the official listing for Varsity Rough Font. Having a high-quality source file ensures your printed output does not suffer from pixelation or jagged lines.
How to Pair Distressed Text With Other Styles
One common challenge designers face is knowing how to mix this rugged style with other elements in a layout. If you use only dark, aggressive typefaces, a project can end up feeling overwhelming or too serious. Balance is essential for good composition. Sometimes, introducing a cleaner background element helps the text pop without fighting for attention. On the flip side, sticking entirely to grunge styles creates a cohesive, immersive experience that works very well for specific themes. If you are working on a collection and want to offer different moods, comparing styles like retro display styles can provide inspiration for how to switch between soft and hard visuals.
However, sometimes you need variety within the same family of work. For example, a clothing line might feature a logo that is very tough, but a quote or slogan underneath that requires a friendlier feel. In those cases, looking into softer alternatives such as friendly lettering options allows you to maintain consistency in the catalog without losing impact. Similarly, for seasonal marketing campaigns, swapping out the energetic collegiate font for something moodier like atmospheric winter scripts can shift the emotional response of the customer. Understanding these nuances helps you build a library of assets that serve multiple purposes.
Technical Considerations for Print-On-Demand Sellers
For creators selling physical goods, licensing and file formats often dictate which fonts are viable choices. You generally want typefaces that allow for customization and come in standard formats like TTF or OTF so they work easily in software like Adobe Illustrator or Silhouette Studio. Many designers overlook the importance of kerning and tracking adjustments before sending files to a printer. Even with a great distressed look, if the spacing between letters is inconsistent, the final product might appear messy. Testing your design on mockups is a crucial step before launching a shop.
It is also smart to check if you have access to other complementary assets. Buying individual fonts can add up quickly, especially when you need a full alphabet plus punctuation sets. Taking a look at extensive collections like comprehensive font bundles can save budget while providing you with a wider range of tools for future projects. This approach allows you to experiment with different layouts without worrying about the cost of every single extra asset.
Quick Implementation Checklist
Before finalizing your graphic design, run through these steps to ensure the typography holds up under scrutiny:
- Verify Resolution: Ensure your file supports the size you intend to print, especially for large back-of-shirt graphics.
- Check Contrast: Make sure the texture of the font stands out against your background color or image.
- Proofread Spelling: Distressed fonts can hide missing letters or accidental ligatures easily due to their broken edges.
- Maintain Readability: Test the text at different scales to ensure it remains legible on mobile screens or small tags.
- Licence Review: Confirm your license agreement permits commercial distribution of the finished design.
By paying attention to these details, you move beyond simply placing text on an image and start creating professional-grade designs. The goal is to make the font feel like a natural part of the medium, whether that is canvas, cotton, or vinyl. With the right tools and a clear understanding of where they fit in your workflow, you can produce work that feels genuine and lasts longer in your portfolio.
Explore Design Rainy Winter Fonts for Your Design Projects
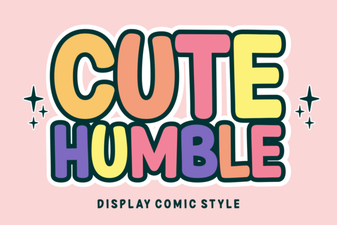 Elegant Fonts for Creative Projects
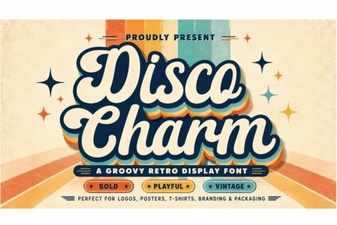 Disco Charm Fonts for Retro Design Projects
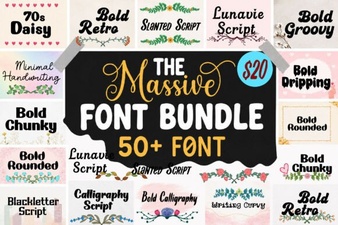 Expand Your Creativity with Our Ultimate Font Bundle
 Choose the Perfect Royal Font for Your Design Project
 Signature Fonts for Creative Projects & Design